With winter slowly creeping up on us (or even kicking open the door some years), now is a good time to think about the potential of frozen pipes. If you begin noticing a drop in water pressure, or even no water at all, this could mean the colder temperatures are affecting the plumbing in your home. Knowing how to insulate pipes – and then doing so – will go a long way to protecting your home, and in turn, protecting your family.
Consider this your official friendly reminder from Simpson Plumbing to insulate your exposed pipes. If you’ve been putting off this crucial action because you aren’t sure how to do it, say goodbye to that confusion. Our easy-to-follow how to insulate pipes guide is a few simple steps that you can follow to prevent a winter plumbing catastrophe.
Once you insulate hot water pipes, you can rest easy knowing Mother Nature will have to go to some extreme lengths to freeze your pipes. Insulating water pipes will also save energy because you won’t have to adjust the temperature settings on your hot water heater or wait very long for hot water to reach your shower, kitchen sink, and appliances for washing.
How to Insulate Pipes
While you may not be able to access every square inch of the pipes in your home, insulating the exposed hot and cold water pipes in your basement or crawlspace will go a long way to preventing damage. Here are a few steps to follow:
- Clean
- Measure
- Choose
- Insulate
Clean ‘Em Up!
Exposed pipes can get filthy from the dust and debris present in the floor cavities above unheated crawl spaces and beneath the flooring. This grime can prevent insulation from clinging appropriately to your pipes, allowing cold in. Remove dirt and grease from your pipes with a rag and gentle cleanser. Be sure to let them dry fully before insulating to keep your piping from losing heat.
Waiting for your pipes to dry is also a great time to check for leaks and be sure that no repairs are required. If you observe any issues, be sure to contact Simpson immediately to get the problem resolved. Taking care of small problems now will prevent big headaches in the future.
Measure Your Pipes
Determine how much insulation you will need – and how wide it should be – by measuring the length and diameter of your pipes. You don’t want to have to make more than one trip to the hardware store–either to buy more, get the right diameter, or return leftover insulation you didn’t need.
Choose your insulation
Foil and fiberglass insulation must be wrapped around the pipe with a ½” overlap to fully seal the pipe. However, both types of insulation are effective in keeping your pipes from freezing. Foam, semi-split insulation is another great option. The slits down the side that allow it to fit over the top of your pipes for easy installation.
Insulating
Once you have chosen your material to insulate water supply pipes, follow these steps to get those lines wrapped. First thing first: Put on protective gear. Working in confined spaces requires safety headgear and gloves. Make sure your gloves are not too bulky, however, as you will need dexterity to complete the project. Goggles and a breathing mask are also excellent to keep on hand if the area is dusty or full of mildew.
How to Insulate Pipes: Foil or fiberglass
- You will be using long strips mounted on a spool. Cut off a reasonable length and secure the start of the insulation to the pipe using duct or foil wrap tape.
- Wrap insulation around the pipe, maintaining a firm tension as you go. Maintain ½ inch of overlap as you wrap.
- At the end of the piece, secure the insulation using the same tape as above.
- When wrapping around bends, be sure that there are no gaps between pieces of insulation. Wrap bends in duct tape to be sure none come loose.
- If using fiberglass, wrap the insulated pipe in plastic pipe wrap to be sure no condensation moisture drips off the pipes.
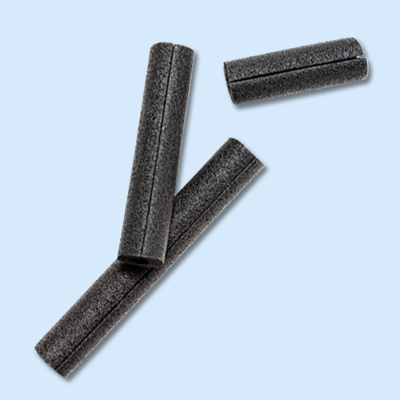
Semi-split foam insulation
- Cut the insulation to match the pipe length.
- Separate the split and fit the tube over your pipe. Secure the opening using duct tape.
- If you require more than one length, use duct tape to seal the joints.
- Finally, secure all insulation at 5 to 6-foot intervals with duct tape to be sure it stays on tight.
Problems With Uninsulated Pipes
Frozen pipes can lead to a host of problems, some of which you may not even realize until extensive damage has already been done. The most immediate problem when pipes freeze is the interruption of your water supply. When water within the pipes freezes, it expands and can block the flow of water.
This means you may find yourself without access to essential water for drinking, cooking, cleaning, and bathing. At least you’ll know right off the bat something is wrong and can take steps to mitigate the problem. It’s when you don’t know your pipes are frozen that can do real harm.
As you know, when water freezes, it expands. With full water lines, it won’t take long until the stress of that expansion breaks a pipe somewhere along the line. You may notice a burst pipe right away–low water pressure or maybe even see water leaking out from the walls. But if it’s a small break, a slow trickle of water could go unnoticed for months.
Burst pipes can result in flooding, structural damage, and the need for costly repairs. When frozen pipes burst, the water damage can be devastating. It can saturate walls, floors, ceilings, and belongings, causing structural deterioration, mold growth, and even damage to electrical systems. Repairing such damage can be time-consuming and expensive, especially mold abatement.
Mold and mildew growth often follow water damage caused by frozen pipes. These can lead to health issues, particularly for individuals with respiratory problems or allergies. Proper cleanup and remediation are necessary to maintain a healthy living environment.
Learning How to Insulate Pipes Will Save You Money
Preventing frozen pipes through insulation, maintaining consistent indoor temperatures (especially on exterior walls), and keeping faucets dripping during cold weather are essential to avoid these issues. Regular maintenance and vigilance are key to safeguarding your home and ensuring you don’t fall victim to the damaging consequences of frozen pipes.
Insulating your pipes will not only prevent frustrating freezing and breakages; it will save money on energy costs by preventing heat loss. With these simple steps, you will gain peace of mind as temperatures drop, so you can enjoy the fun stuff, like hot cocoa and roaring fires, without the plumbing drama.
Looking for professional assistance? Our expert plumbers are happy to help you.
 About Us
  Services
  Plans
Plans  Commercial