
How to Handle a Sudden Drain Backup in Your Bingen, WA Home
A sudden drain backup in your Bingen, WA home demands immediate action to protect your family’s health, limit property damage,…


Taking care of your home requires a diverse set of skills – sometimes you’re a finance manager, other times a procurement officer, maintenance engineer, or interior designer. You may also take on the roles of electrician, landscaper, painter and plumber. What you really are is a problem solver. When it comes to plumbing issues – from toilets that won’t stop running to the leak near the shower – your sleuthing skills need to be top-notch, because leaks are sneaky and if left unchecked, can cause significant damage to your home. Here are a few tips for finding a shower leak that’s causing water damage.
Not all shower leaks cause puddles on the floor and you may not always hear the giveaway drip signaling a leak. You may need to check for more subtle signs that plumbing repairs are needed. Look for these additional clues:
If you’ve seen signs of water damage, these tests will help you find the source of the shower leak.
Splash leaks occur when water escapes beyond a shower door or curtain. if you have a shower door, pour water around the door frame. Wait at least five minutes to see if water seeps out. Look for gaps between the rubber door sweep or gaskets if your door has them. And if the shower door is joined to the wall or floor with caulking, look for gaps there too.
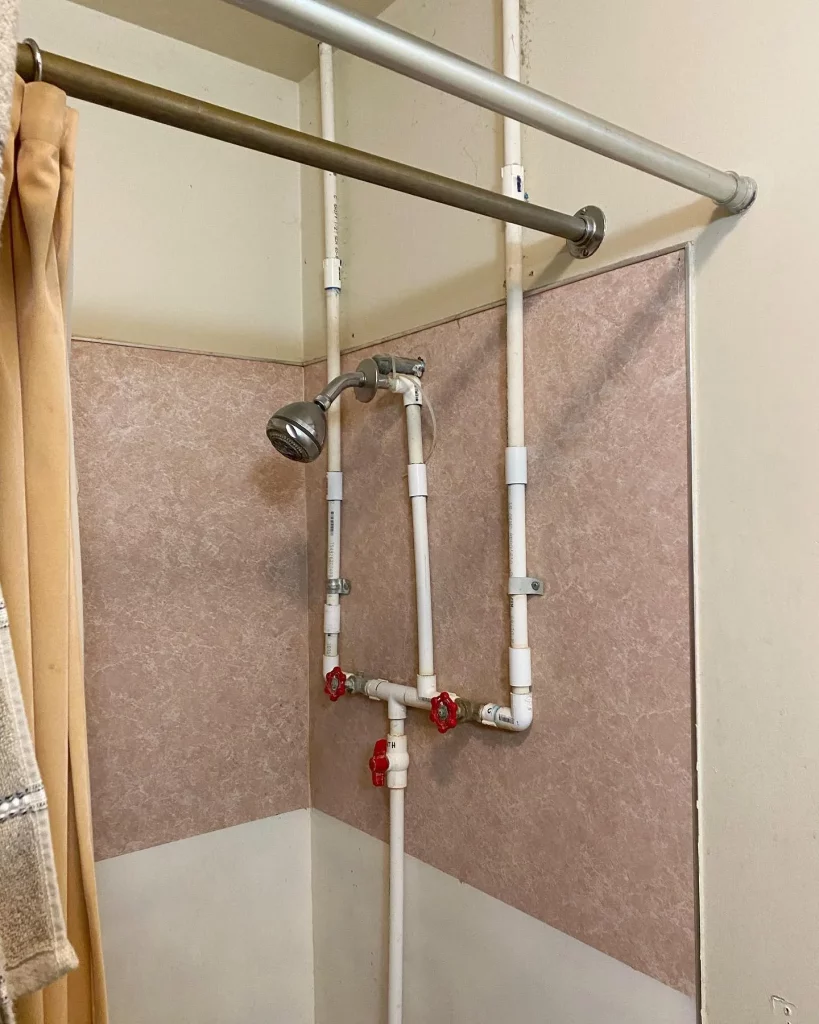
Your shower head or faucets may be causing leaks. Check your shower head to make sure spray holes are free of clogs. If you can, take the shower head off and check the O-ring seal for wear. And check the escutcheons, the flat metal pieces around the shower head or faucet pipes. These should be sealed tightly against the shower wall.
Damaged grout and tile can allow water to seep behind walls. Look closely at the grout, from floor to ceiling. Check for loose or cracked tiles. If your visual inspection shows no problem, then go a step further by soaking each wall, one at a time. Look for water seepage.
Water can sneak around the outside of a drain if it’s worn or not properly sealed. If the drain is visible through the joists of a basement or an access panel, plug it, run some water, release the plug and look for water. If you don’t have easy access to the drain, plug it, run some water, and mark the edge of the puddle. After about an hour, check the size of the shower floor puddles, and if it’s smaller, then you have a drain leak.
To determine if shower floor plan is cracked, first let the shower floor dry completely. Cover or plug the drain tightly. Empty several buckets of water into the shower, filling the base to the threshold, and wait. Water marks on the ceiling in a multi-story home or on the basement floor joists can appear after 15 minutes for a severe leak. But it may take up to eight hours for visible signs of a floor leak.
While some of the leak tests described above may prompt you to think about a DIY solution, a professional plumber can provide peace of mind and save you time when dealing with shower leak. For plumbing services in the Vancouver, Washington area, contact Simpson Plumbing. Our team of experts will repair your shower leak – and let you get back to enjoying your family and home.


